
You know that one room. The one where the door doesn’t fully open anymore because something is always wedged behind it. Or that corner of the garage you haven’t actually seen since 2019. Maybe it’s just a closet, but opening it feels like a risk assessment every time.
Here’s the thing. You’re not alone in wondering if there are actual home clean hacks that work or if “decluttering” is just a word people throw around on Instagram reels. Because let’s be honest; nobody wants to spend their entire weekend drowning in boxes and decision fatigue only to end up with three trash bags and the same amount of mess.
The good news? There’s a better way. This isn’t about becoming a minimalist overnight or throwing away everything you own. It’s about eight practical, step-by-step junk removal tips that actually save time on house cleanouts.
1. Create a Clear Plan and Prioritize
The biggest mistake people make isn’t keeping too much stuff. It’s starting without a map.
You wouldn’t drive from Miami to Seattle without GPS, right? The same logic applies to your junk removal project. Walking into a cluttered house with no plan is how you end up sorting the same drawer three times and somehow making more mess than when you started.
Residential junk removal tips almost always begin here: room by room, one at a time.
- Step 1: Walk through your home with a notebook. Not your phone but a notebook. Write down every area that needs attention. Be specific. Not “bedroom.” “Bedroom closet, top shelf, the suitcase situation.” Not “garage.” “Garage, corner behind the tool cabinet, the boxes from the previous owners.”
- Step 2: Rank them. Not by size. By emotional weight. Start with the spaces that don’t have sentimental attachment. The linen closet. The bathroom cabinet. The pantry. These are your warm-up laps. They build momentum without requiring you to decide if your grandmother’s tea set sparks joy or just guilt.
- Step 3: Give each room its own deadline. “Tuesday night: hall closet. Thursday evening: kitchen junk drawer. Saturday morning: guest room.” Written down. Visible. Treated like an appointment you can’t cancel.
A home decluttering guide isn’t complicated. It’s just a list of small promises you keep to yourself.
2. Sort Items Using Categories
You know that feeling when you open a closet, stare at the chaos, and immediately want to close it again? That’s not laziness. That’s your brain protecting itself from decision fatigue.
Household junk removal strategies work best when you stop asking “should I keep this?” and start asking “which box does this belong in?” The question shifts from emotional to mechanical. And mechanical is faster.
- Step 1: Set up five bins, boxes, or clear zones. Label them:
Keep – You use it regularly. It works. You’d replace it if it broke.
Donate – Good condition, but your life no longer needs it. Someone else’s life might.
Sell – Actually valuable. Not “maybe worth five bucks at a garage sale.” Genuinely sellable.
Trash – Broken, stained, expired, or genuinely unusable.
Recycle – Paper, cardboard, certain plastics, electronics.
- Step 2: Touch each item once. This is the rule that separates professionals from procrastinators. Pick it up. Decide. Put it in the correct bin. Do not set it down to “think about later.” Later is where clutter goes to multiply.
- Step 3: Take photos of sentimental items before letting them go. That kindergarten art project? Photograph it. Your first concert ticket? Photograph it. The item leaves, but the memory doesn’t.
Pro Tip: The One-Year Rule is your friend. If you haven’t used it, worn it, or even remembered you owned it in the last twelve months, it’s not “keeping.” It’s storing. And storing costs you space, mental energy, and the guilt of walking past it every day.
3. Tackle Easier Areas First
There’s this unspoken rule people follow during cleanouts, and it’s almost always wrong. They walk into the most overwhelming room, the garage, the attic, the guest room that became a storage unit, and think, “Might as well get the worst over with.”
Hacks of cleaning house aren’t about brute force. They’re about momentum. And momentum doesn’t start with the heaviest lift.
- Step 1: Identify your low-stakes zones. The bathroom cabinet under the sink. The linen closet. The pantry. The junk drawer in the kitchen. These areas have almost no sentimental attachment. No one cries over expired canned goods or mismatched Tupperware lids.
- Step 2: Set a timer for 20 minutes. Clear everything out. Wipe the surfaces. Toss what’s expired, broken, or genuinely useless. Organize what’s left. Step back and look at it.
- Step 3: Use the win. One clean closet makes the next room feel less impossible. A cleared bathroom cabinet gives you permission to open the hall closet. Momentum is psychological. You’re not just cleaning spaces, you’re proving to yourself that you can.
4. Use Timed Sessions and Focus Techniques
Here’s something nobody tells you about decluttering: your brain has an expiration date.
You can power through for about twenty minutes before decision fatigue sets in. After that, every choice feels like filing taxes. You start second-guessing. You hold up a single candle and wonder if maybe, just maybe, you’ll need it someday even though you don’t own a lighter and you’re pretty sure it’s from 2018.
This is why hacks for house cleaning that ignore human psychology fail. You can’t out-discipline a tired brain.
- Step 1: Set a timer for 20 to 30 minutes. That’s it. Not “until this room is done.” Not “until I finish this shelf.” Twenty minutes. When the timer goes off, you stop.
- Step 2: Work in sprints. Sort. Decide. Toss. No phone. No “while I’m in here, I should also organize the shoes.” Just one category, one zone, one timer.
- Step 3: Take a real break. Walk away from the space. Make tea. Scroll your phone. Sit in a room that isn’t actively judging you. Five minutes. Then another sprint, or call it a day.
Pro Tip: Keep a “maybe” box. When you genuinely can’t decide, put it in the box, seal it with tape, write today’s date on it, and store it somewhere out of sight. If you don’t open it in six months, you don’t need it. Recycle the whole box without looking inside. Future you will thank current you for not making them decide twice.
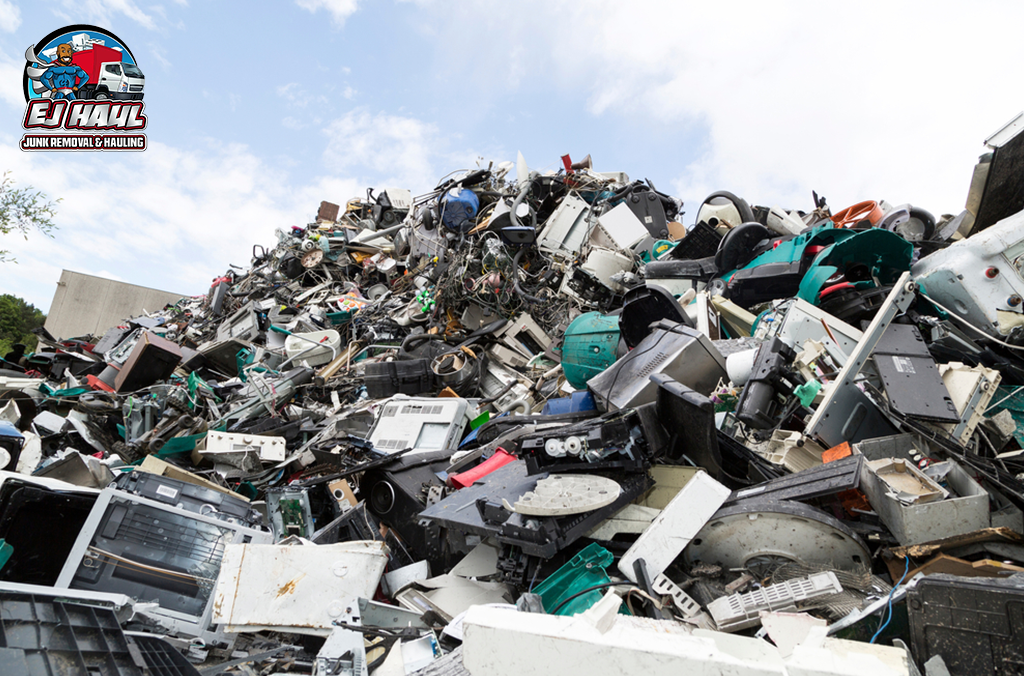
5. Hiring Junk Removal Services When Needed
At some point during every serious cleanout, the homeowner stands in front of something and thinks: I cannot move this. I cannot lift this. I do not even know how this got here.
That sofa your uncle helped you carry up three flights of stairs in 2017? He moved to Arizona. The broken treadmill that’s been “waiting for repairs” since before the pandemic? It weighs more than your car. And that mysterious metal thing in the corner of the garage? You’ve lived here eight years and you still don’t know what it is.
Junk removal experts exist precisely for this moment. Not because you’re incapable. Because some jobs require more than one person, a stronger back, or a truck that isn’t your Honda Civic.
- Step 1: Admit what you can’t do. Heavy furniture. Appliances. Electronics that need proper recycling. Entire garages filled with previous owners’ leftovers. These aren’t DIY projects. They’re professional assignments.
- Step 2: Look for junk removal services that do more than just haul. The good ones donate what’s usable, recycle what’s not, and dispose of hazardous materials legally. They don’t just make your mess disappear, they handle it responsibly.
- Step 3: Get a transparent quote. Reputable junk removal companies will assess the volume, not weigh you down with hourly surprises. They show up, you point, they load, they leave. No awkward negotiation. No “actually, that’ll cost extra.”
6. Prepare a Decluttering Zone and Gather Tools
You know what slows down a cleanout more than indecision? Geography.
The bed becomes a sorting surface, then you can’t sleep. The floor becomes temporary storage, then you can’t walk. The dining table disappears under “donate” bags, and suddenly dinner is eaten standing at the kitchen counter.
Step-by-step junk removal tips always include this, and for good reason: a designated staging area keeps the chaos contained.
- Step 1: Choose your zone. A corner of the garage. A spare bedroom. The basement. Anywhere that isn’t your everyday living space. This is where sorting happens. This is where “maybe” boxes live until they become “definitely donate.”
- Step 2: Gather your tools before you need them. Not when you’re holding a dusty box and wondering where the trash bags went. Right now.
Heavy duty trash bags. The cheap ones tear. Spend the extra dollar.
Clear storage bins. Not black. Not blue. Clear. You need to see what’s inside without opening a time capsule.
Labels and a thick marker. “Holiday décor.” “Winter coats.” “Sentimental—review later.” Be specific.
Gloves. Not optional. Dust, sharp edges, mystery substances. Gloves.
Hand truck or dolly. For the heavy stuff you’re not hiring out. Your lower back will send a thank you note.
7. Handle Hazardous or Special Waste Properly
Here’s where most cleanouts hit a wall.
You find the old paint cans. The dead laptop from 2014. The box of batteries you’ve been “saving for recycling” since approximately the Obama era. And suddenly, the momentum stops.
Because you know you can’t just throw this stuff in the regular trash. But you also don’t know where it goes. So it sits. And sits. And the one corner you cleared becomes the new home for things you don’t know how to dispose of.
To declutter your home efficiently means dealing with the complicated stuff on purpose, not avoiding it until it becomes someone else’s problem.
- Step 1: Identify what can’t go in the bin.
Paint, solvents, and chemicals – Toxic. Never in regular trash.
Electronics – Contain metals and materials that shouldn’t see a landfill.
Batteries – Especially lithium-ion. They start fires in trucks and facilities.
Light bulbs – CFLs contain mercury. LEDs are safer but still e-waste.
Prescription medications – Never flush. Never donate. Take-back programs only.
- Step 2: Find your local drop-off. Most counties have hazardous waste facilities open on certain days. Some have permanent locations. A quick search for “[your city] hazardous waste disposal” will get you there.
- Step 3: Consolidate. One box for electronics. One bag for batteries. One corner for paint cans. Keep them separate, visible, and ready to load when you finally make the trip.
8. Maintain a Clutter-Free Home
You’ve done the hard part. The room is clear. The floor is visible. You can actually park in the garage again. It feels like moving into a house you’ve lived in for years but never really seen.
Now comes the part nobody talks about: keeping it that way.
Because clutter isn’t a one-time event. It’s a slow drip. A few pieces of mail here. A package you haven’t unpacked there. The “I’ll deal with this later” pile that somehow becomes furniture. Six months from now, you’re standing in front of a closet that’s somehow full again, wondering if you secretly host a reality show about hoarding.
- Step 1: Adopt the One-In, One-Out Rule. For every new item that enters your home, one existing item must leave. New shoes? Donate a pair you haven’t worn in two years. New blender? The old one goes to Goodwill.
- Step 2: Create a donation station. A box, a bin, a specific corner of the mudroom. When you find something you no longer need, it goes in the box.
- Step 3: Schedule seasonal resets. Spring and fall aren’t just for changing your wardrobe; they’re for recalibrating your space. One Saturday in April. One Saturday in October. Walk through each room with fresh eyes. What’s accumulated? What’s no longer useful? What snuck in while you weren’t paying attention?
Conclusion
Here’s what eight tips add up to. You don’t need to become a professional organizer or dedicate your entire life to decluttering. You just need a plan, a few categories, and permission to start small. Room by room. Timer by timer. Keep, donate, trash, recycle. The door that wouldn’t open? It opens now. The garage you haven’t seen since 2019? You just parked in it.
If you’re staring at furniture that won’t fit through the door or a cleanout that feels too big to finish, EJ Haul LLC makes it disappear. Our junk removal company handles the heavy lifting so you don’t have to. Call 1 855 722 5535 or visit https://ejhaul86.com/junk-removal-services/ and get your space back.
Frequently Asked Questions
Start with one room, set a 20 minute timer, and sort everything into Keep, Donate, and Trash. Work in sprints, not marathons. Momentum beats perfection.
Use the five bin system—Keep, Donate, Sell, Trash, Recycle—so every item has a destination. For bulky furniture, call a junk removal company to clear it in one visit.
Plan room by room with real deadlines. Start where there’s no emotional weight. Use the One-Year Rule. And don’t try to do it all in one weekend.
Create a “maybe” box. Seal it, date it, and store it out of sight. If you haven’t opened it in six months, recycle the whole box without looking inside.
When furniture won’t fit through the door, you’re on a tight deadline, or the cleanout requires heavy lifting and proper disposal. Professionals save time and your back.